
Joining and Hosting a Video Session
To start a scheduled video session, click on a session with the Video icon in your Calendar. The Session Overview window will include a Join Video Call button that you can click to begin hosting the session.
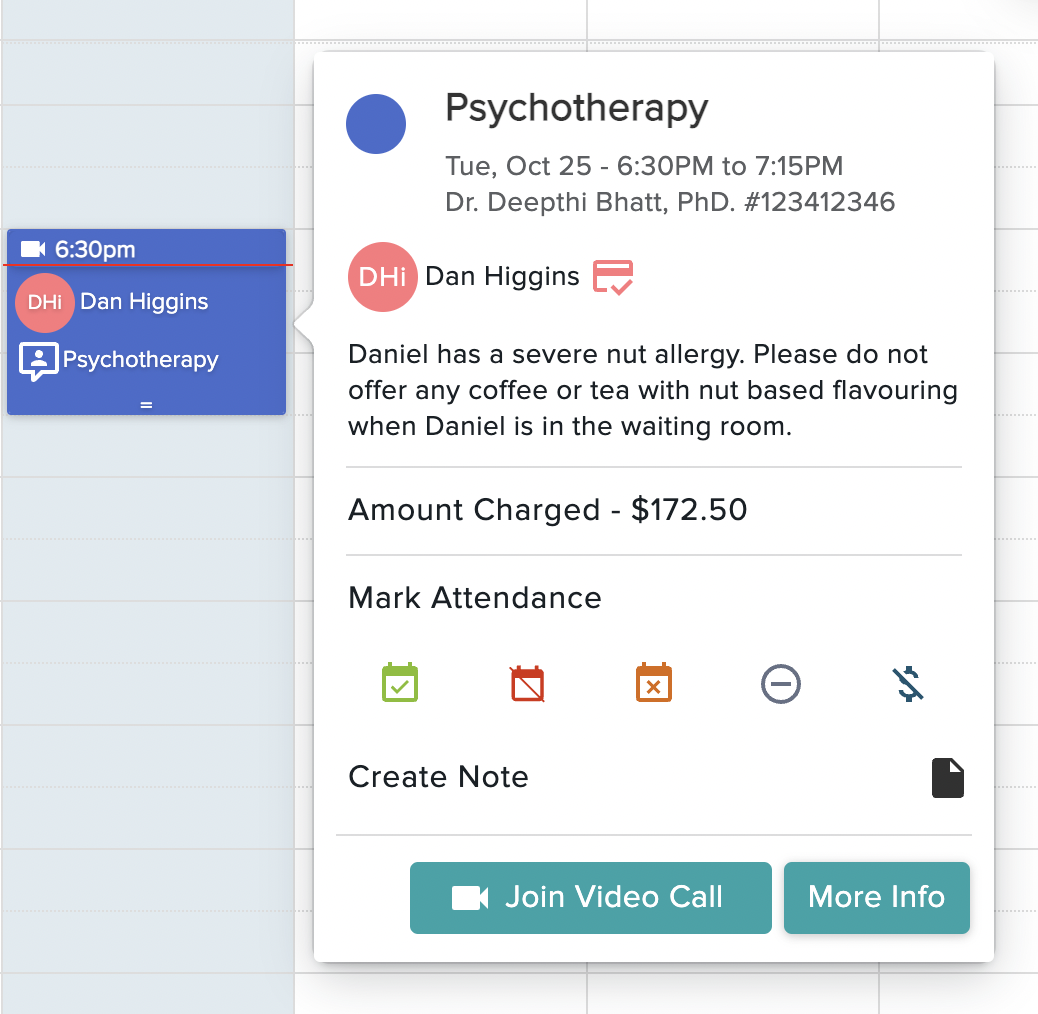
There is an 8-hour +/- window for joining a video session. Clients can enter the waiting room up to 8 hours before the session start time, and the join button remains active for up to 8 hours after the session end time. This allows flexibility for late arrivals or time zone differences.
Zencare Practice Management Video supports individual, couple, and family sessions.
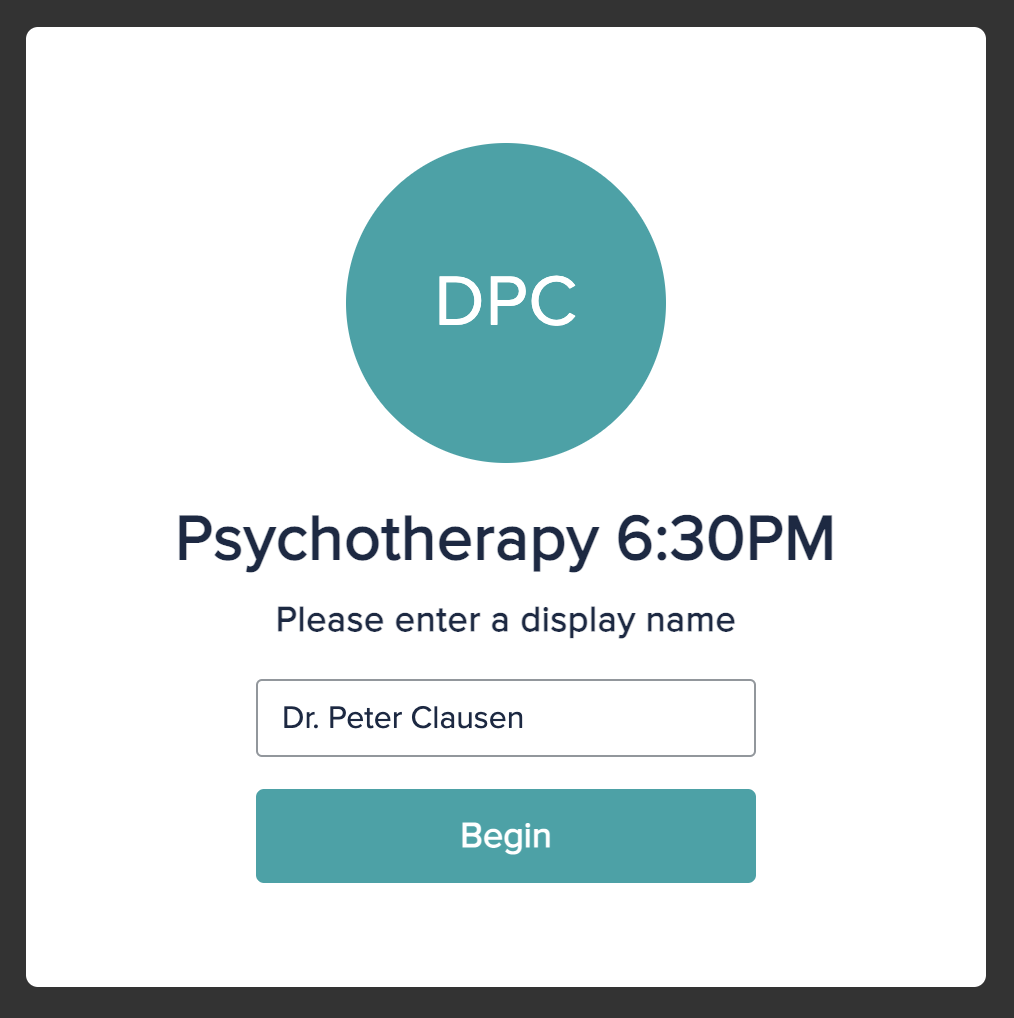
Selecting Join Video Call opens the secure video session in a new browser tab. Before entering the session, you’ll be prompted to:
- Confirm your display name
- Confirm your microphone and camera preferences
The display name defaults to your first and last name and title from your therapist profile. Select Begin to enter the session.
If this is your first time using video sessions on a device, your browser may prompt you to grant access to your camera and microphone. Once access is granted, those devices will connect automatically in future sessions.
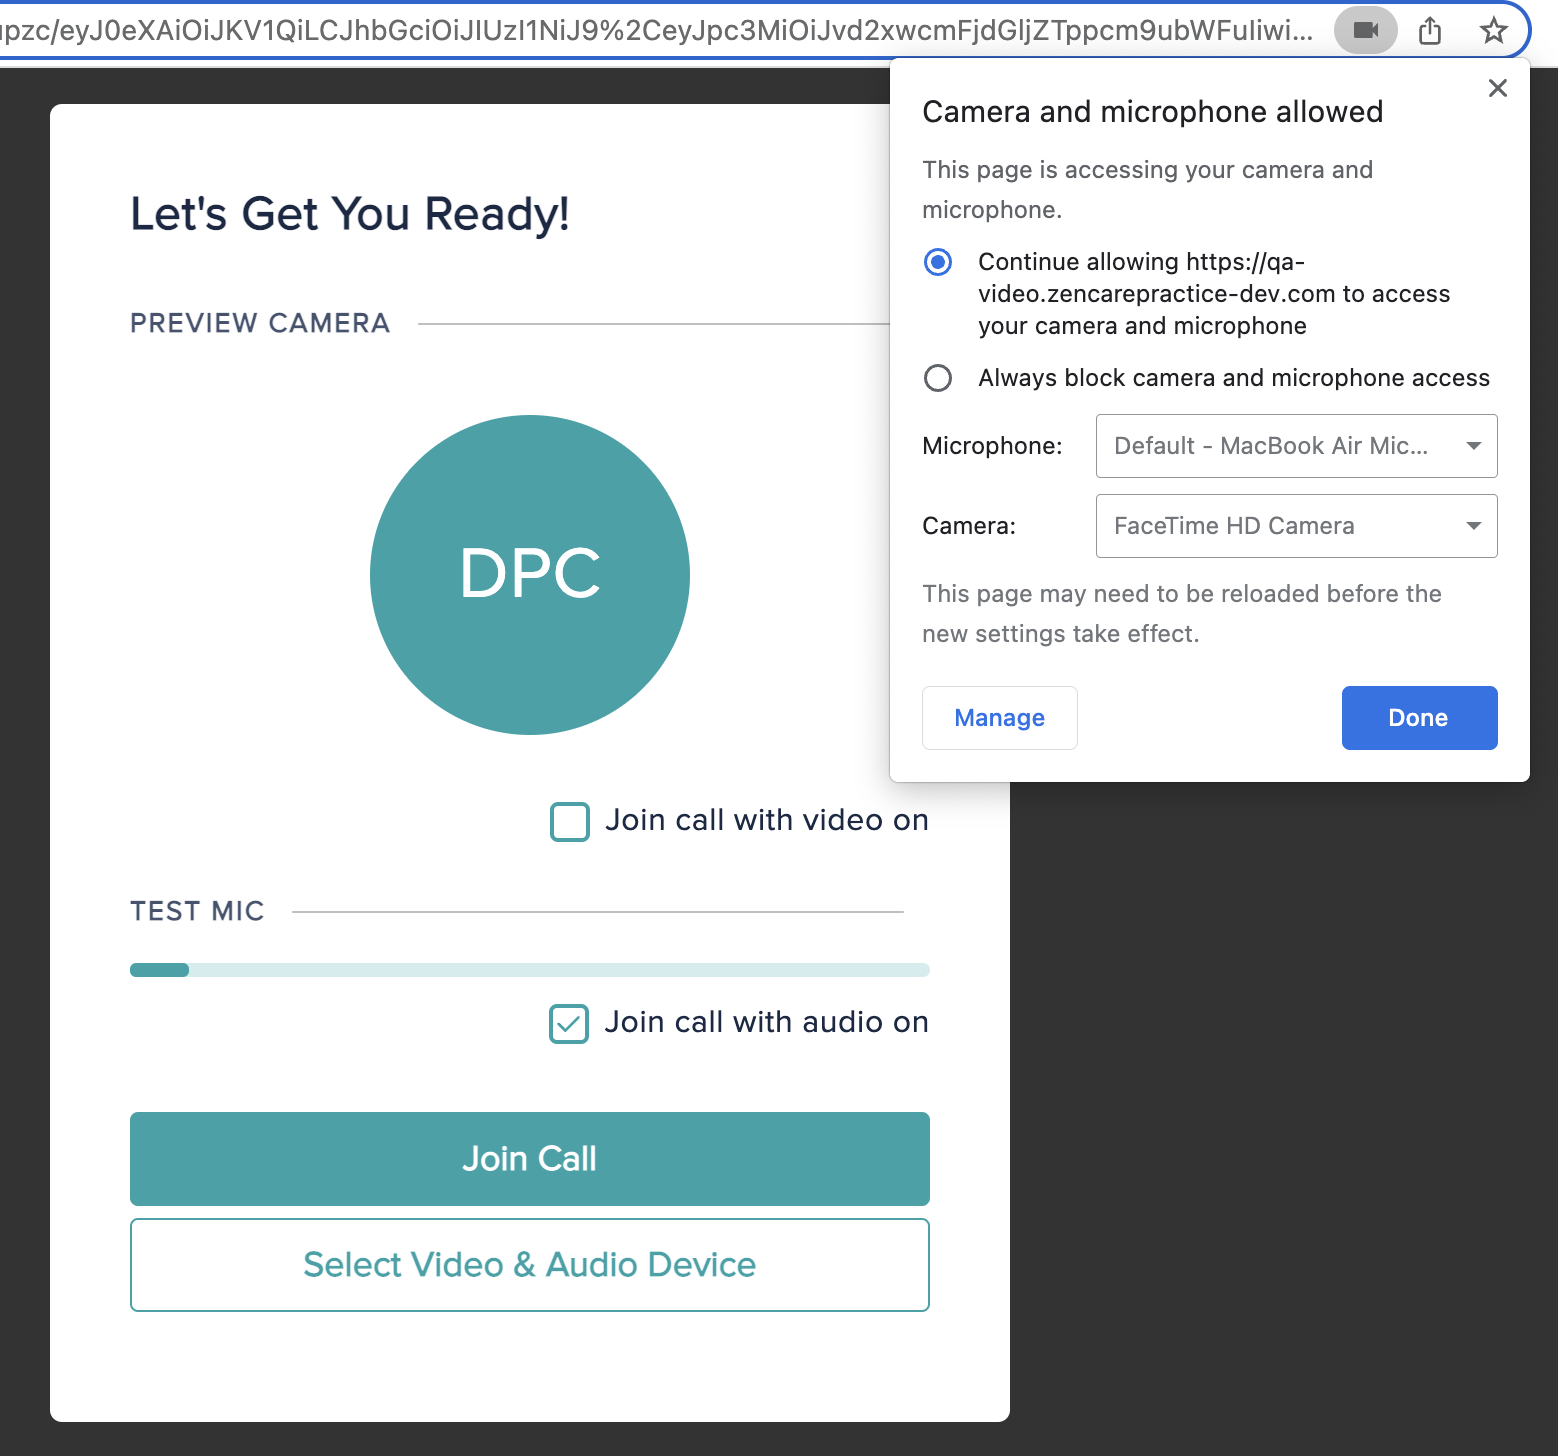
If access has been blocked, you may see a camera icon with a red “x” in the top-right corner of your browser. Select the icon, allow access to the webcam and microphone, select Done, and refresh the page.
Video Session Interface
Once inside the session, you will see your mirror (or initials) in the top-left corner of the screen. You can drag and drop it to reposition it anywhere on the screen. A connection strength indicator appears next to your name inside the mirror.
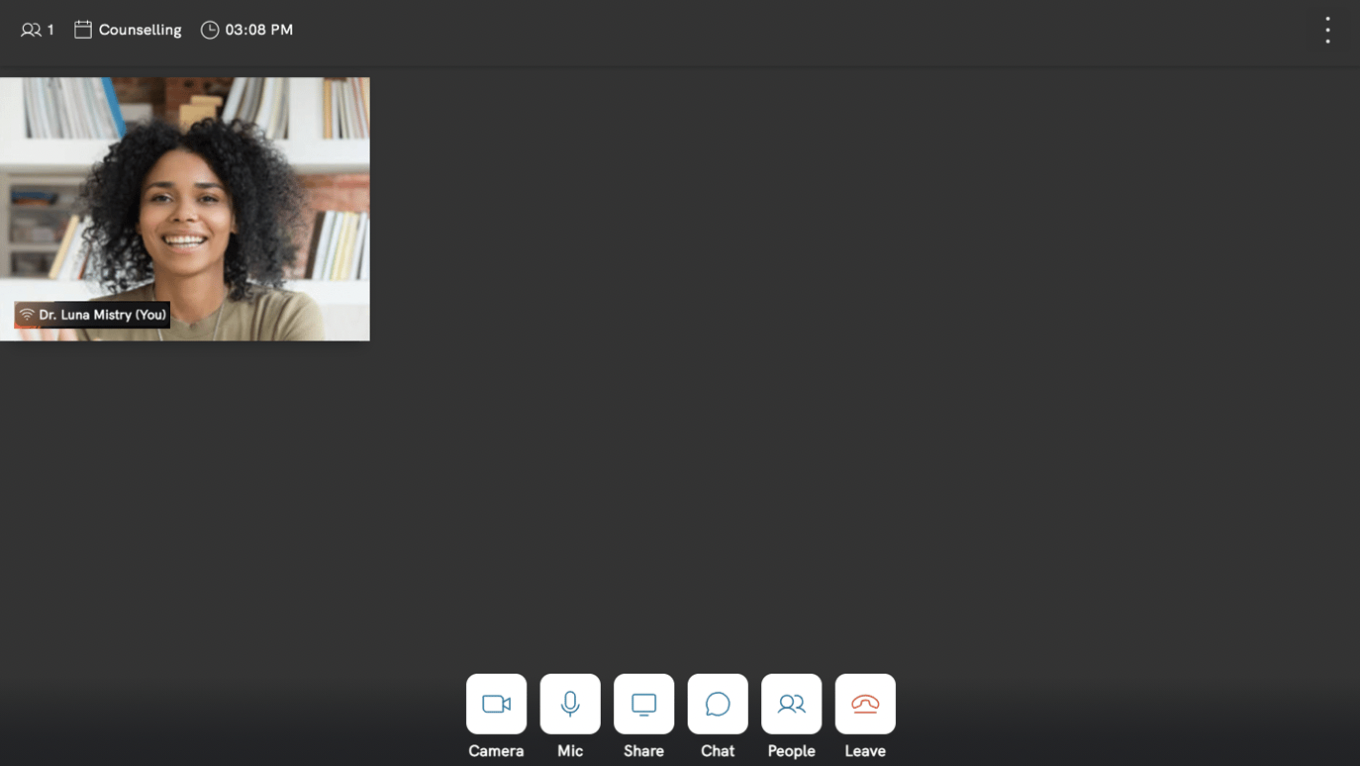
Your client(s) appear in the center of the screen. Each participant’s display includes:
- Their name at the bottom of their video
- A connection indicator to the right of their name
The same connection indicator appears next to your own name, allowing both parties to identify connection issues during the session. If either you or a client is muted, a red mute indicator appears next to the display name.
Using the Toolbar
The Toolbar is located at the top of the screen and allows you to view:
- Session duration
- Type of service being provided
- Number of participants invited
On the far right of the toolbar, you'll see a clickable menu indicated by three vertical dots. When selected, this menu will expand to show you several different options.

Toolbar Menu Options
- Unpin Toolbar – Removes the toolbar from being fixed at the top of the screen. It remains accessible when hovering your cursor near the top.
- Unpin Action Bar – Removes the Action Bar from being fixed at the bottom of the screen. It reappears when hovering your cursor near the bottom.
- Hide Mirror – Removes your own video display from your view.
- Audio & Video Input – Opens audio and video configuration options.
Selecting Audio & Video Input opens a pop-up window where you can:
- Select audio and video input devices
- Save device preferences for future sessions
Both Therapists and Clients can also enable background noise filtering, which is enabled by default and can be adjusted from the settings menu.
The Video Effects option allows Therapists or Clients to apply a blurred background or select from available stock background images.
Using the Action Bar
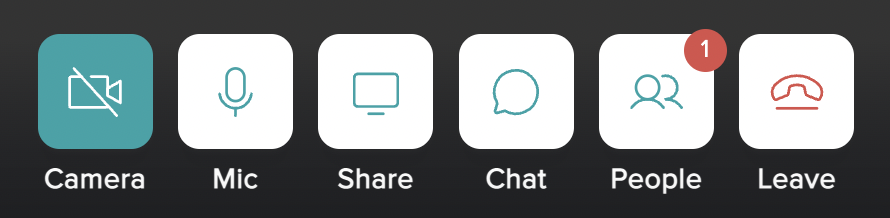
The Action Bar is located at the bottom of the screen and provides access to session controls. From the Action Bar, you or your client can:
- Turn webcam on or off
- Mute or unmute microphone
- Start or stop screen sharing
- Start or stop session recording (if subscribed to the recording add-on)
- Open or close the chat
- Open the People menu
- Leave the session
People Menu and Waiting Room
The People menu allows you to view participants and manage admission to the session. When clients join a video session, they are placed into a virtual waiting room until admitted.
An Admit option appears next to each client’s name once they arrive. You can:
- Admit clients individually by selecting Admit
- Select Start Session to admit all waiting participants at the same time
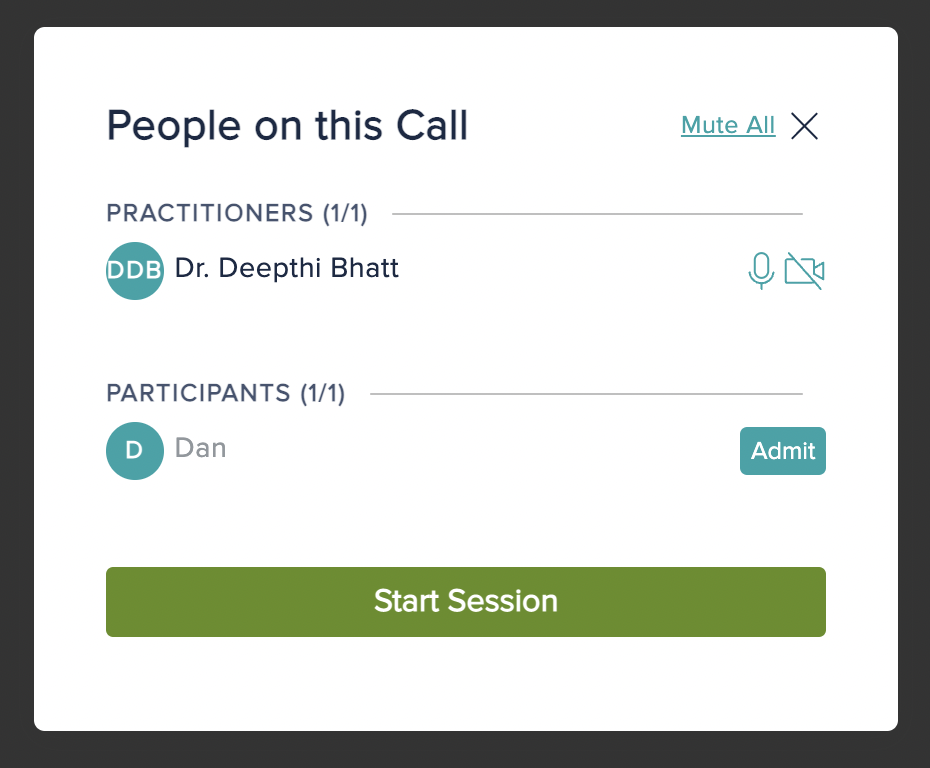
You can also select Mute All from this menu. If Mute All is enabled, you must return to the People menu and select Unmute All to restore participant microphone control.
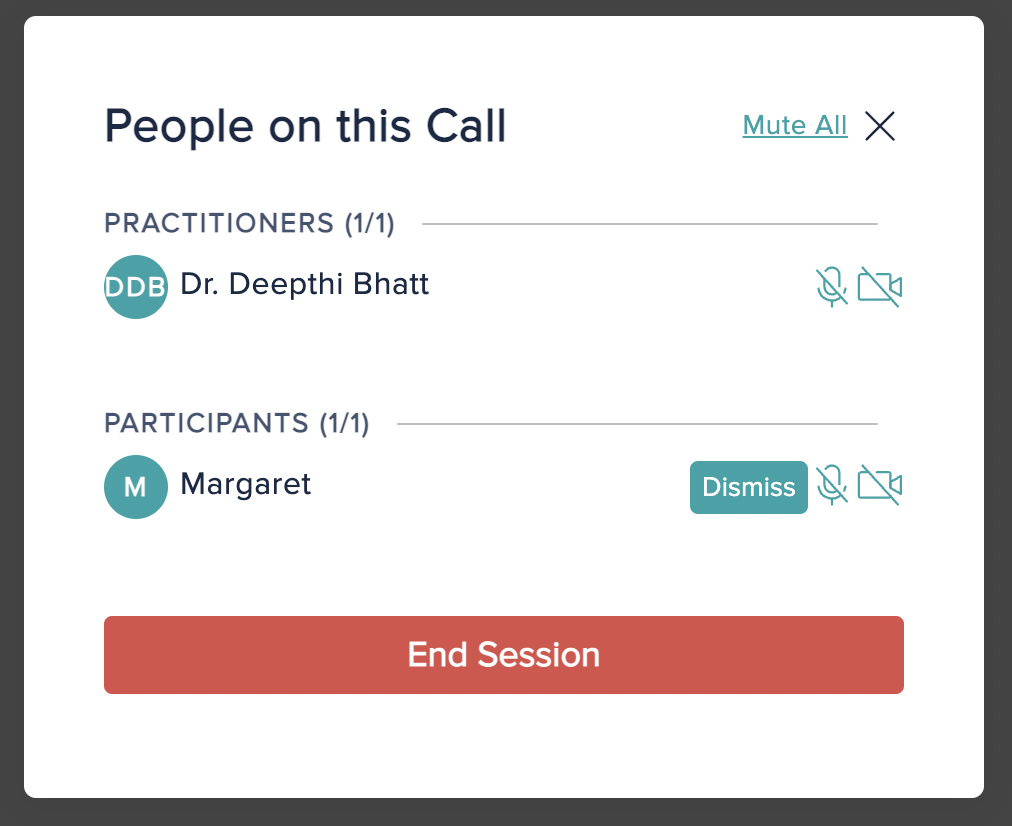
Once all clients are admitted, the Start Session button changes to End Session. During the session, you may dismiss any participant by opening the menu next to their name and selecting Dismiss from Session.
Ending a Video Session
To end a session for all participants, open the People menu and select End Session. You’ll be prompted to confirm that you want to end the session. Once confirmed, all participants are dismissed and will see a session-ended confirmation screen.
If anyone attempts to rejoin after the session has ended, they will see a message indicating that the session has already ended.
You may also leave a session without ending it by selecting the red Leave (telephone icon) button in the Action Bar. When you do, the client will see a notification that you’ve left the session.
Clients can also leave the session at any time by clicking the same button in their Action Bar.
Comments
Please sign in to leave a comment.